Blocking unwanted incoming emails is a crucial task for maintaining a clean and secure email environment, especially when managing a website or an email server via cPanel. cPanel, a popular web hosting control panel, offers various tools and features to help you manage your email accounts effectively, including options to block unwanted emails. Here's a detailed guide on how to achieve this:
Filtering Spam Using SpamAssasin:
Step 1: Accessing SpamAssassin in cPanel
-
Log in to cPanel: Start by logging into your cPanel account. You can access cPanel through the WHMCS client area at https://www.hosterpk.com/clientarea/, navigating to 'Services' > 'My Services', selecting your hosting account, and then clicking on 'Login to cPanel' on the left sidebar.
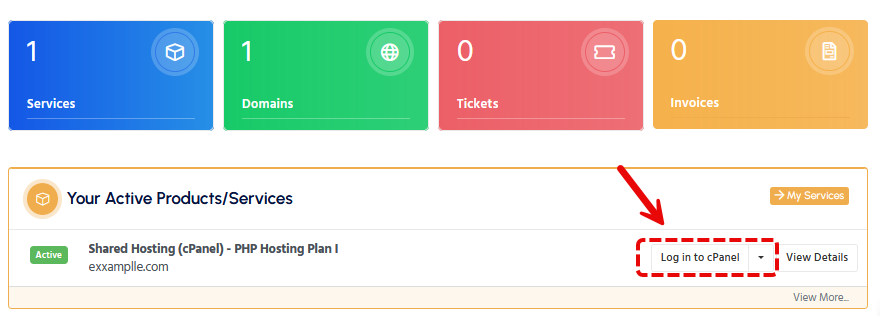
Step 2: Navigate to Email Management Tools
Find Email Section: Once logged in, navigate to the "Email" section of cPanel. Here, you will find various options related to email management, such as Email Accounts, Forwarders, Email Routing, and more.
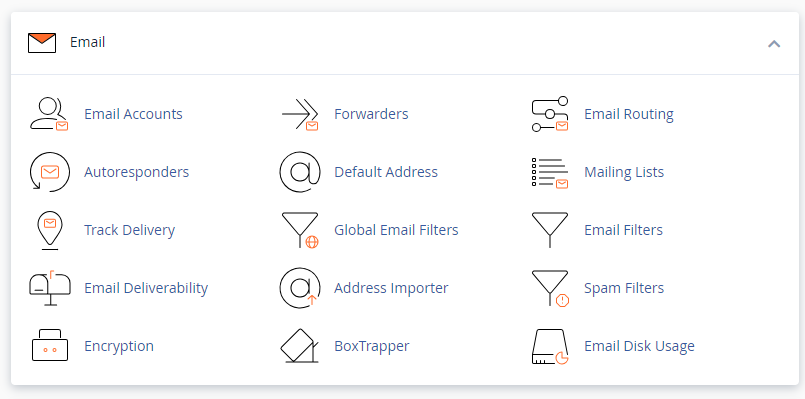
Step 3: Use Spam Filters
Spam Filters: cPanel provides built-in tools to combat spam. Access the "Spam Filters" feature to manage settings that help identify and block spam emails. You can enable Apache SpamAssassin, a powerful tool that uses a wide range of heuristic algorithms on email headers and content to identify "spam" (unsolicited email).
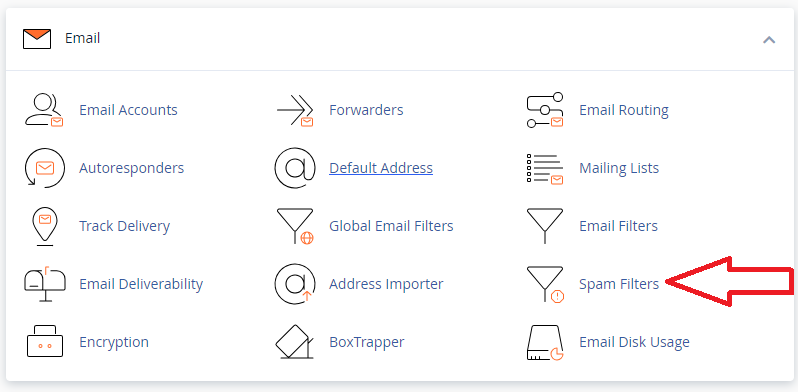
Step 4: Configure SpamAssassin
Enable SpamAssassin: Once in the Spam Filters section, ensure that SpamAssassin is enabled. You can also configure its settings to automatically delete spam or adjust the spam score required for an email to be considered spam.

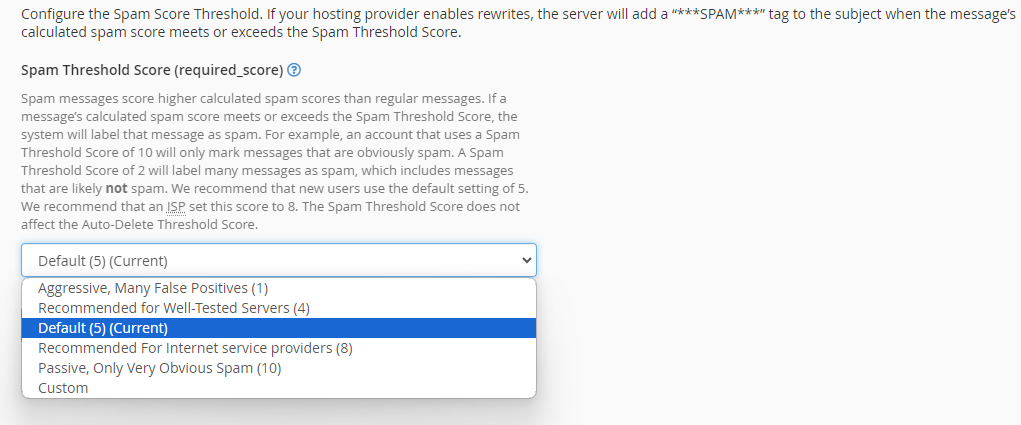
- The default spam score is usually set to 5. You can adjust this score according to your needs. A lower score (e.g., 4) means that the filter will be more aggressive, catching more emails as spam. Conversely, a higher score (e.g., 6 or 7) will make the filter less sensitive, reducing the likelihood of false positives.
- To change the score, enter the desired number in the box or adjust the slider if available.
-
Advanced Configuration (Optional):
- For more detailed adjustments, cPanel might offer an “Advanced Configuration” or "Configure SpamAssassin" option. This area allows you to manually add rules or configure specific behaviors for the spam filter.
- Be cautious when making changes in the advanced configuration, as incorrect settings can lead to legitimate emails being marked as spam or spam emails bypassing the filter.
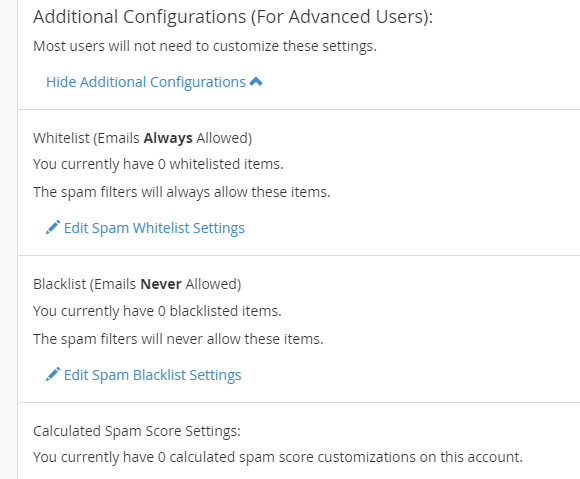
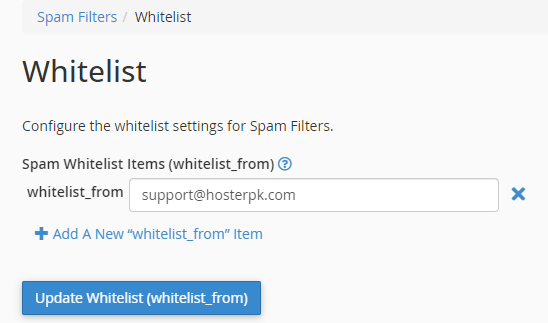
Add to Whitelist: To whitelist an email address, enter it in the provided field under the "Whitelist_from" section. You can specify individual email addresses (e.g., support@hosterpk.com) or an entire domain using the asterisk as a wildcard (e.g., *@domain.com).
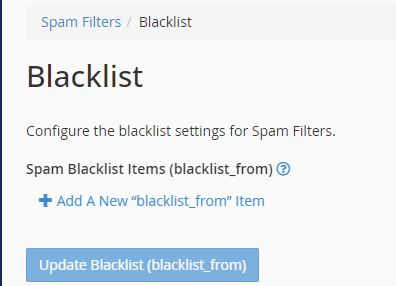
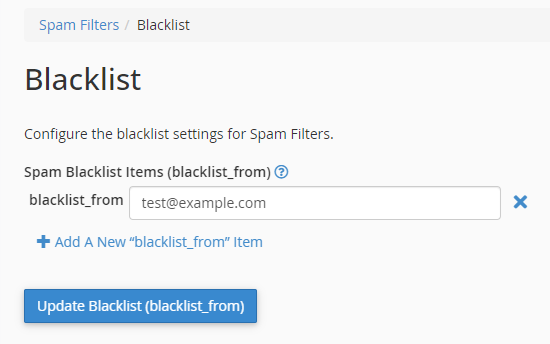
Add to Blacklist: To blacklist an email address, you'll use the "blacklist_from" field. Here, you can add the specific email addresses you want to block. For example, entering "test@example.com" would blacklist that specific address. To block all emails from a particular domain, you can use an asterisk as a wildcard, like "*@example.com", which would block all emails coming from that domain.
Filtering Spam using Email Filters
Email Filters: For more specific control, use the "Email Filters" option. Here, you can set up rules to block emails based on certain criteria, such as sender's email, subject line, or specific words in the body of the email. Detailed article on Spam filtering using Emails filters.
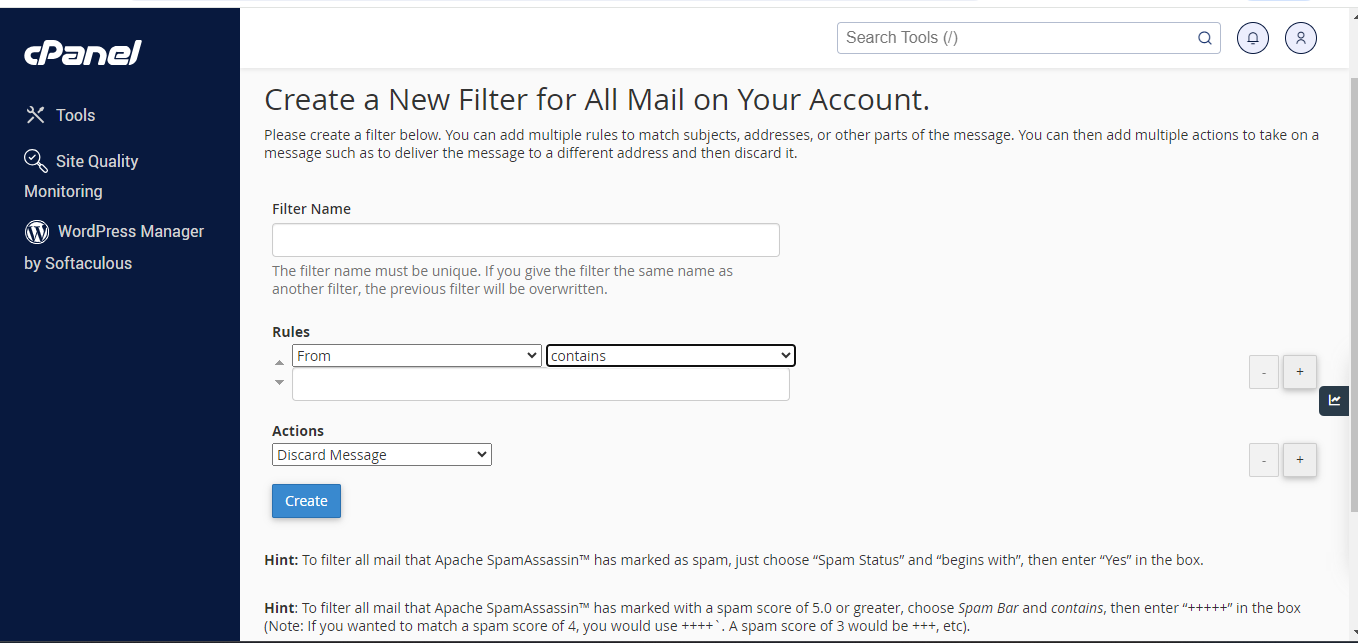
Add a New Filter: Click on "Create a New Filter." Name your filter and define the rules. For example, you can reject emails from a specific sender or those containing certain keywords.
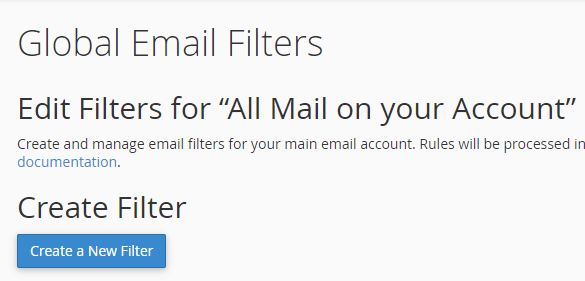
Step 6: Use Global Email Filters
Global Filters: If you manage multiple email accounts, consider setting up Global Email Filters. This works similarly to individual email filters but applies to all email accounts under your cPanel.
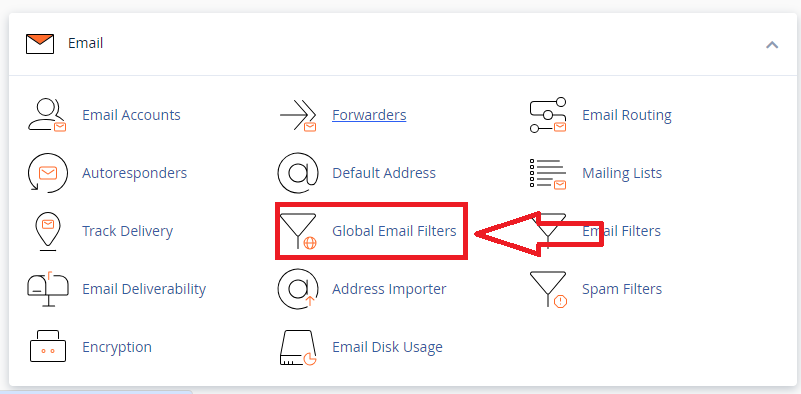
Step 7: Block Specific Email Addresses or Domains
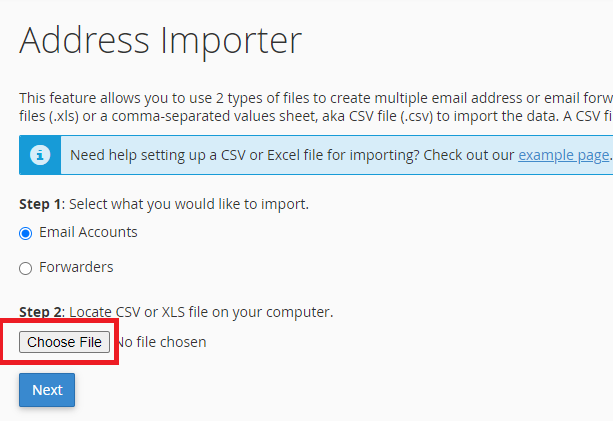
Address Importer: To block emails from specific addresses or domains, you can use the "Address Importer" feature to upload a list of email addresses or domains you wish to block.
Step 8: Use Third-Party Anti-Spam Solutions
HosterPK also offers a professional inbound spam filtering service using MailChannels, a cloud-based email filtering service designed to detect and block spam and malicious email traffic before it reaches your network. It's a powerful ally for any cPanel user looking to maintain a clean, secure email environment.
Step 9: Regular Review and Adjustment
Monitor and Adjust: Regularly review the effectiveness of your email filters and spam settings. Adjust them as needed based on the types of unwanted emails you receive.
For blocking unwanted incoming emails at the DNS level through cPanel
For blocking unwanted incoming emails at the DNS level through cPanel, there are specific DNS settings that can be adjusted to enhance email security and filter out spam. These settings are particularly focused on verifying the authenticity of incoming emails and preventing email spoofing. Here’s how to approach it:
Professional Email Services
For users looking for an even more robust email solution, consider our Professional Email Services. This service provides enhanced security features, larger storage, and prioritized support. Learn more at https://www.hosterpk.com/email-hosting.
Need Help?
If you encounter any issues configuring SpamAssassin or have any questions, please open a support ticket here or start a LiveChat session using the icon located at the bottom right of the screen. Our team is always ready to assist you!
Remember, keeping your inbox safe is our top priority. With SpamAssassin and our guidance, you're well on your way to a safer and more efficient email experience.
