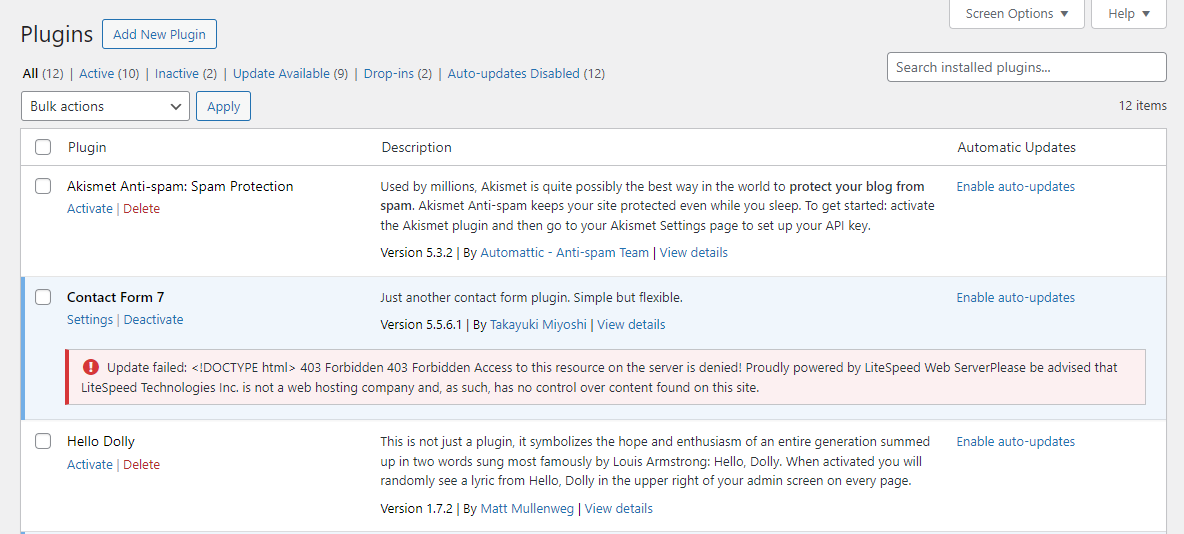
Resolving 'Update failed: <!DOCTYPE html> 403 Forbidden 403 Forbidden Access to this resource on the server is denied!' Error on WordPress
Encountering the 'Update failed: <!DOCTYPE html> 403 Forbidden 403 Forbidden Access to this resource on the server is denied!' error during a WordPress update can be frustrating. This error generally means that your server is denying access to a specific resource needed for the update. Here’s a detailed guide to help you troubleshoot and resolve this issue:

Step 1: Check File Permissions:
File permissions control who can read, write, or execute a file. Incorrect permissions can prevent WordPress from accessing necessary files, resulting in a 403 Forbidden error.
- Files: Set to 644 (Readable and writable by the owner, readable by others).
- Directories: Set to 755 (Readable and executable by everyone, writable by the owner).
You can change file permissions using an FTP client or via the command line. Here’s how to do it using the command line:
find /path/to/your/wordpress -type f -exec chmod 644 {} \;
find /path/to/your/wordpress -type d -exec chmod 755 {} \;
Step 2: Check .htaccess File:
The .htaccess file is used by Apache web server to manage URL redirections and other access controls. A misconfigured .htaccess file can block access to necessary resources.
Standard WordPress .htaccess File:
Make sure your .htaccess file contains the standard WordPress rules:
# BEGIN WordPress

RewriteEngine On
RewriteBase /
RewriteRule ^index\.php$ - [L]
RewriteCond %{REQUEST_FILENAME} !-f
RewriteCond %{REQUEST_FILENAME} !-d
RewriteRule . /index.php [L]

# END WordPress
Remove Restrictive Rules:
Remove any restrictive rules that might block access, such as:
<FilesMatch ".(py|exe|phtml|php|PHP|Php|PHp|pHp|PHP|phP|PhP|php5|suspected|php7|php8)$">
  Order allow, deny
  Deny from all
</FilesMatch>
<FilesMatch "^(index.php|credits.php|customize.php|edit-comments.php|edit-tags.php|edit.php|checkbox.php|export.php|input.php|link.php|load-scripts.php|load-styles.php|dropdown.php|mer)">
  Order allow, deny
  Allow from all
</FilesMatch>
Step 3: Disable ModSecurity Temporarily:
ModSecurity is a web application firewall (WAF) that can sometimes block legitimate requests, including WordPress updates.
- Log in to cPanel.
- Navigate to "Security" -> "ModSecurity".
- Disable ModSecurity for your domain temporarily.
Step 4: Temporarily Disable Web Application Firewall (WAF):
If you have a WAF enabled (like Cloudflare, Sucuri, etc.), it might block the update process. Temporarily disable the WAF to see if the issue resolves. Consult your WAF provider’s documentation for specific instructions.
Step 5: Deactivate LiteSpeed Cache Plugin:
Sometimes, caching plugins like LiteSpeed Cache can interfere with updates. Deactivate the plugin to check if it resolves the issue.
- Log in to your WordPress admin dashboard.
- Go to "Plugins".
- Deactivate the LiteSpeed Cache plugin.
Step 6: Manually Update WordPress:
If the automated update process fails, you can manually update WordPress:
- Download the latest WordPress version from wordpress.org.
- Extract the files on your local machine.
- Use an FTP client to upload the extracted files to your WordPress root directory. Ensure you do not overwrite the
wp-contentdirectory andwp-config.phpfile. - Complete the update by following any on-screen instructions in your WordPress admin dashboard.
Step 7: Contact Your Hosting Provider:
If none of the above steps work, the issue might be due to server-level configurations that only your hosting provider can address. Contact your hosting provider's support team for assistance.
Summary:
By systematically following these steps, you should be able to identify and resolve the cause of the 403 Forbidden error during a WordPress update. Checking file permissions, reviewing your .htaccess file, and temporarily disabling security features are key steps in this troubleshooting process. If the issue persists, your hosting provider can offer additional support to ensure your WordPress site updates successfully.
If you encounter any issues, please open a support ticket here or a LiveChat session using the icon located at the bottom right of the screen.
