
Changing the PHP version of a cPanel-hosted website is possible in several ways. MultiPHP, the PHP Version Selector, and the .htaccess file are the most common methods.
Using the Select PHP Version
cPanel also offers the PHP Version Selector for changing the PHP version. Using this feature, you can choose the PHP version for your website, and it will automatically configure the site accordingly.
To change your site’s PHP version using the “Select PHP Version” option in cPanel, follow these steps:
- Log in to your cPanel account.
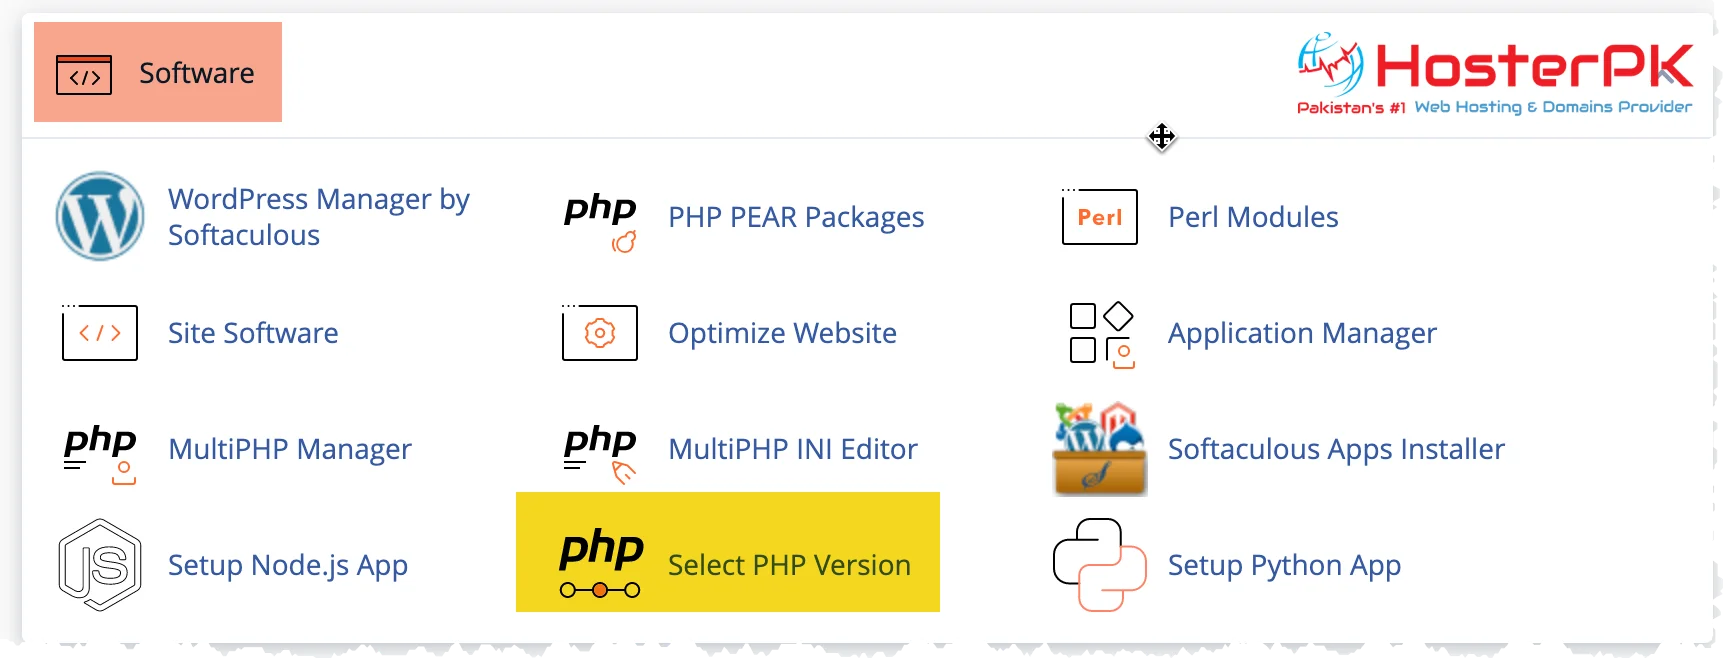
- Scroll down to the “Software” section and click the “Select PHP Version” option.
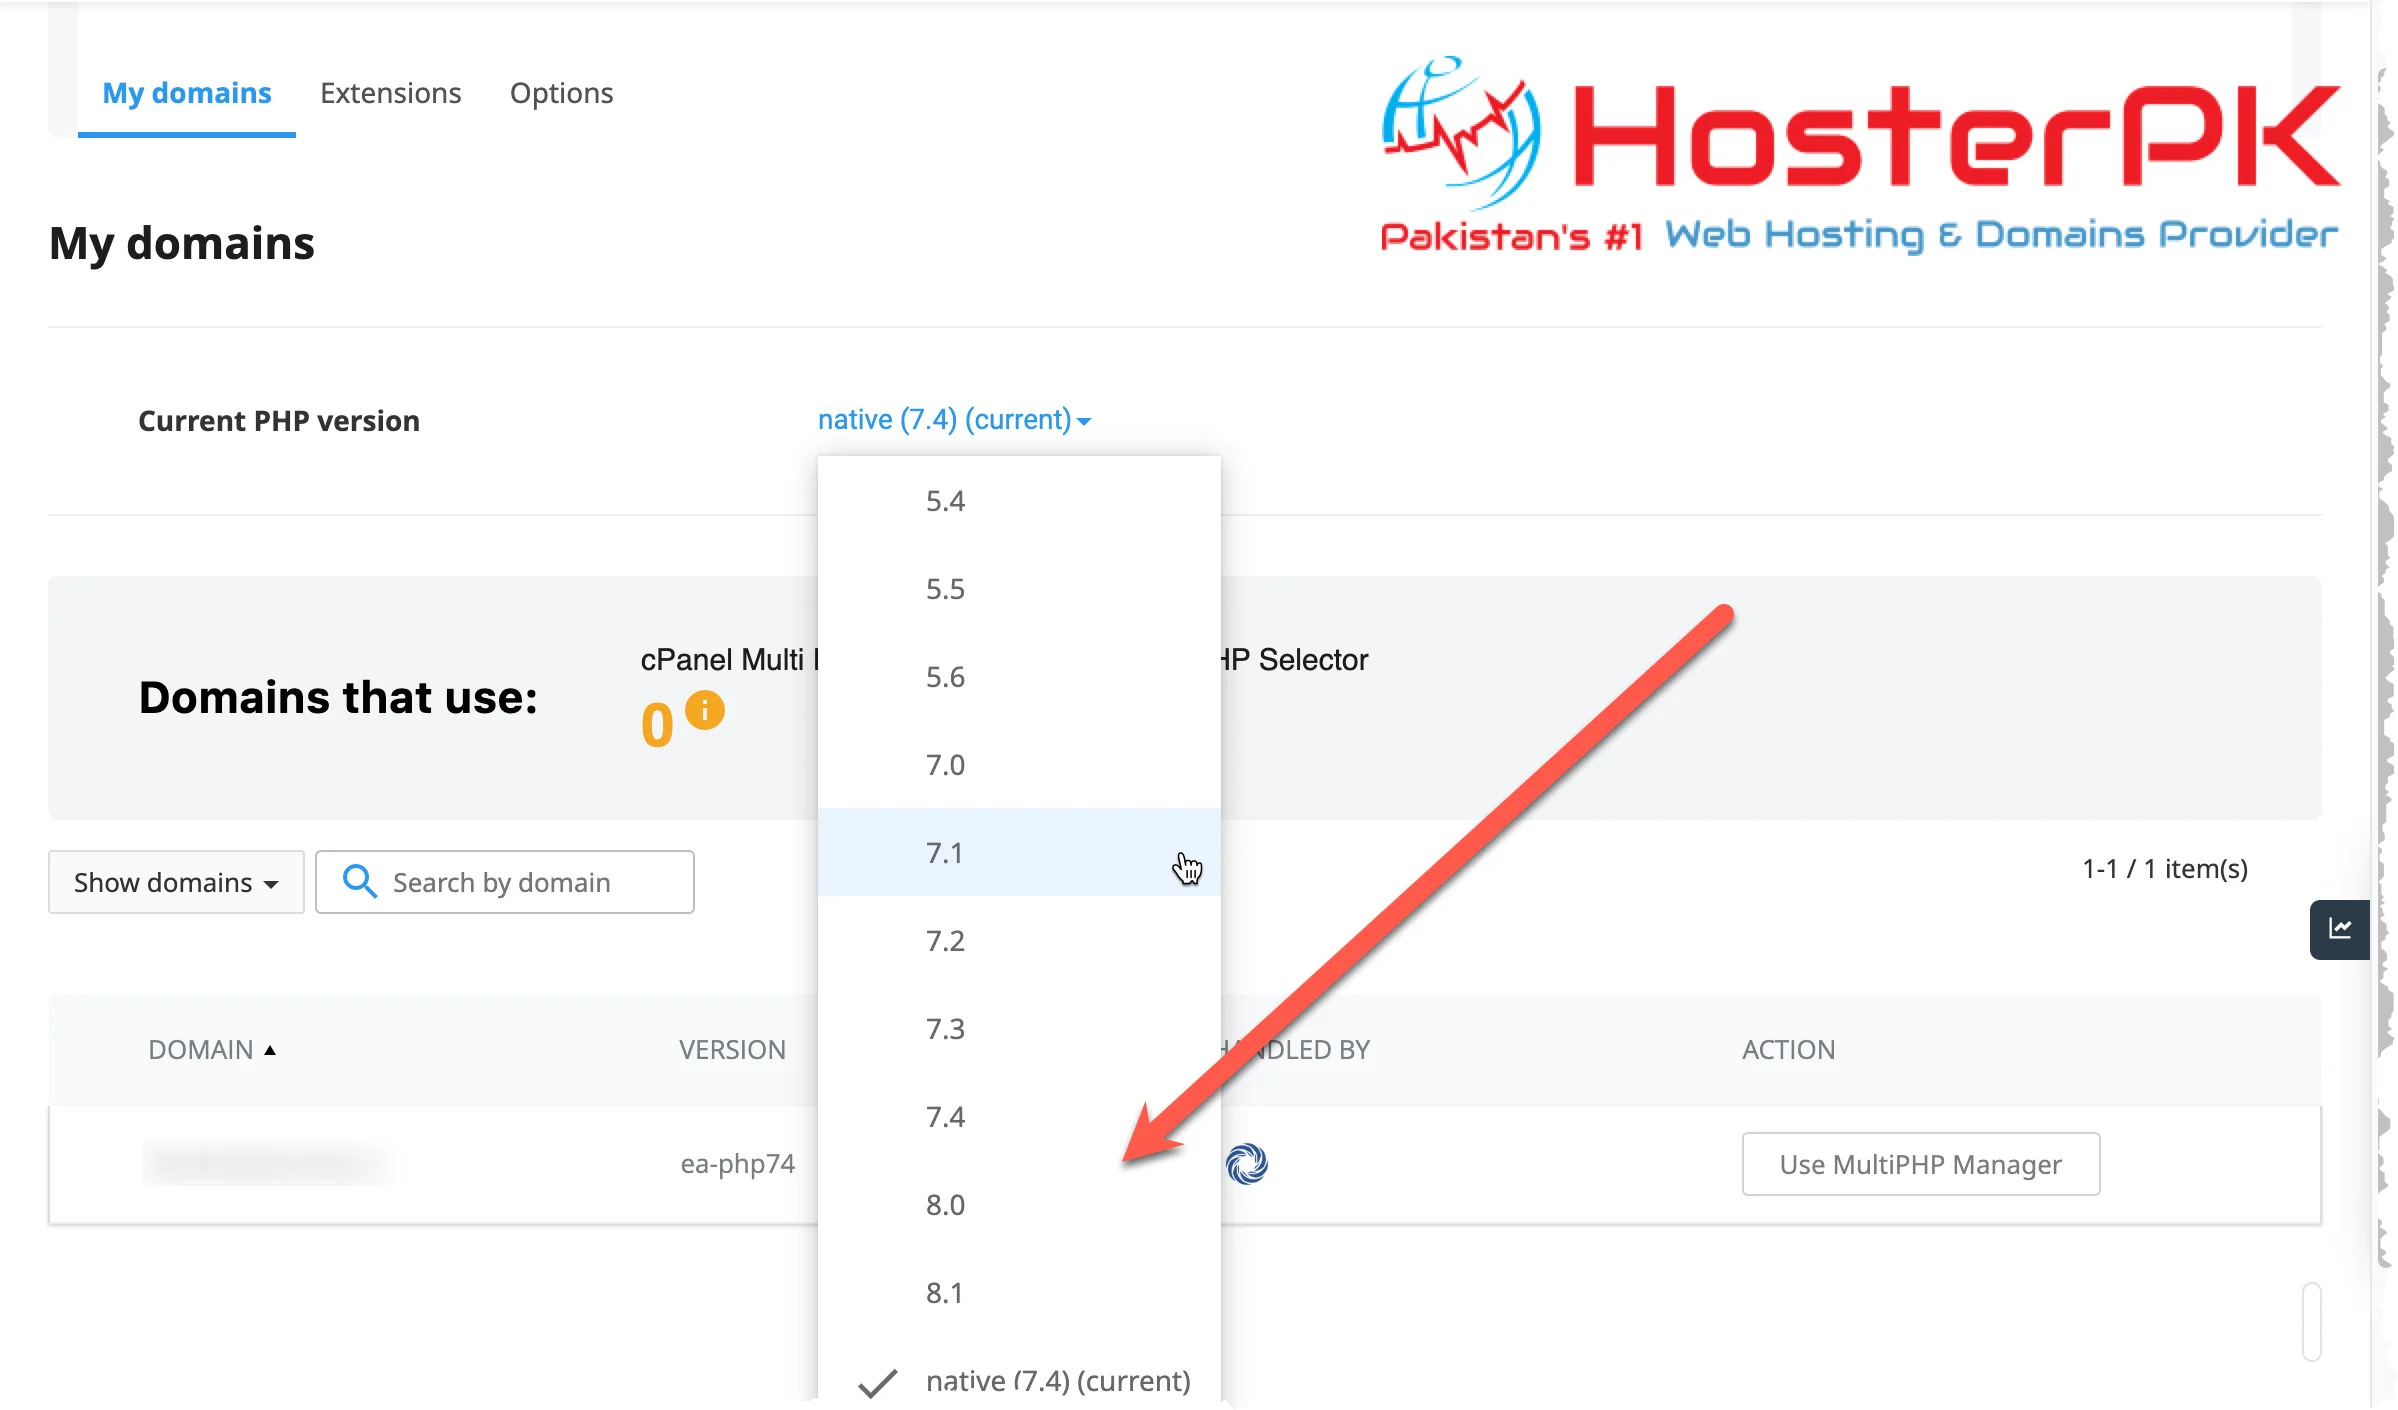
- Select the desired PHP version from the drop-down menu on the next page. You can also use the “Native” option, which will use the default PHP version for your server.
- If you have multiple domains on your account, select the domain for which you want to change the PHP version.
- Once you have selected the PHP version, click on the “Set as current” button.
- PHP version change will be confirmed by a message.
You should test your site thoroughly after making the change to ensure it is working properly.
Using MultiPHP
MultiPHP allows you to change the PHP version for each domain within the cPanel interface. You can manage multiple domains easily with this tool.
To change your site’s PHP version using MultiPHP in cPanel, follow these steps:
- Log in to your cPanel account.
- Scroll down to the “Software” section and click on the “MultiPHP Manager” option.

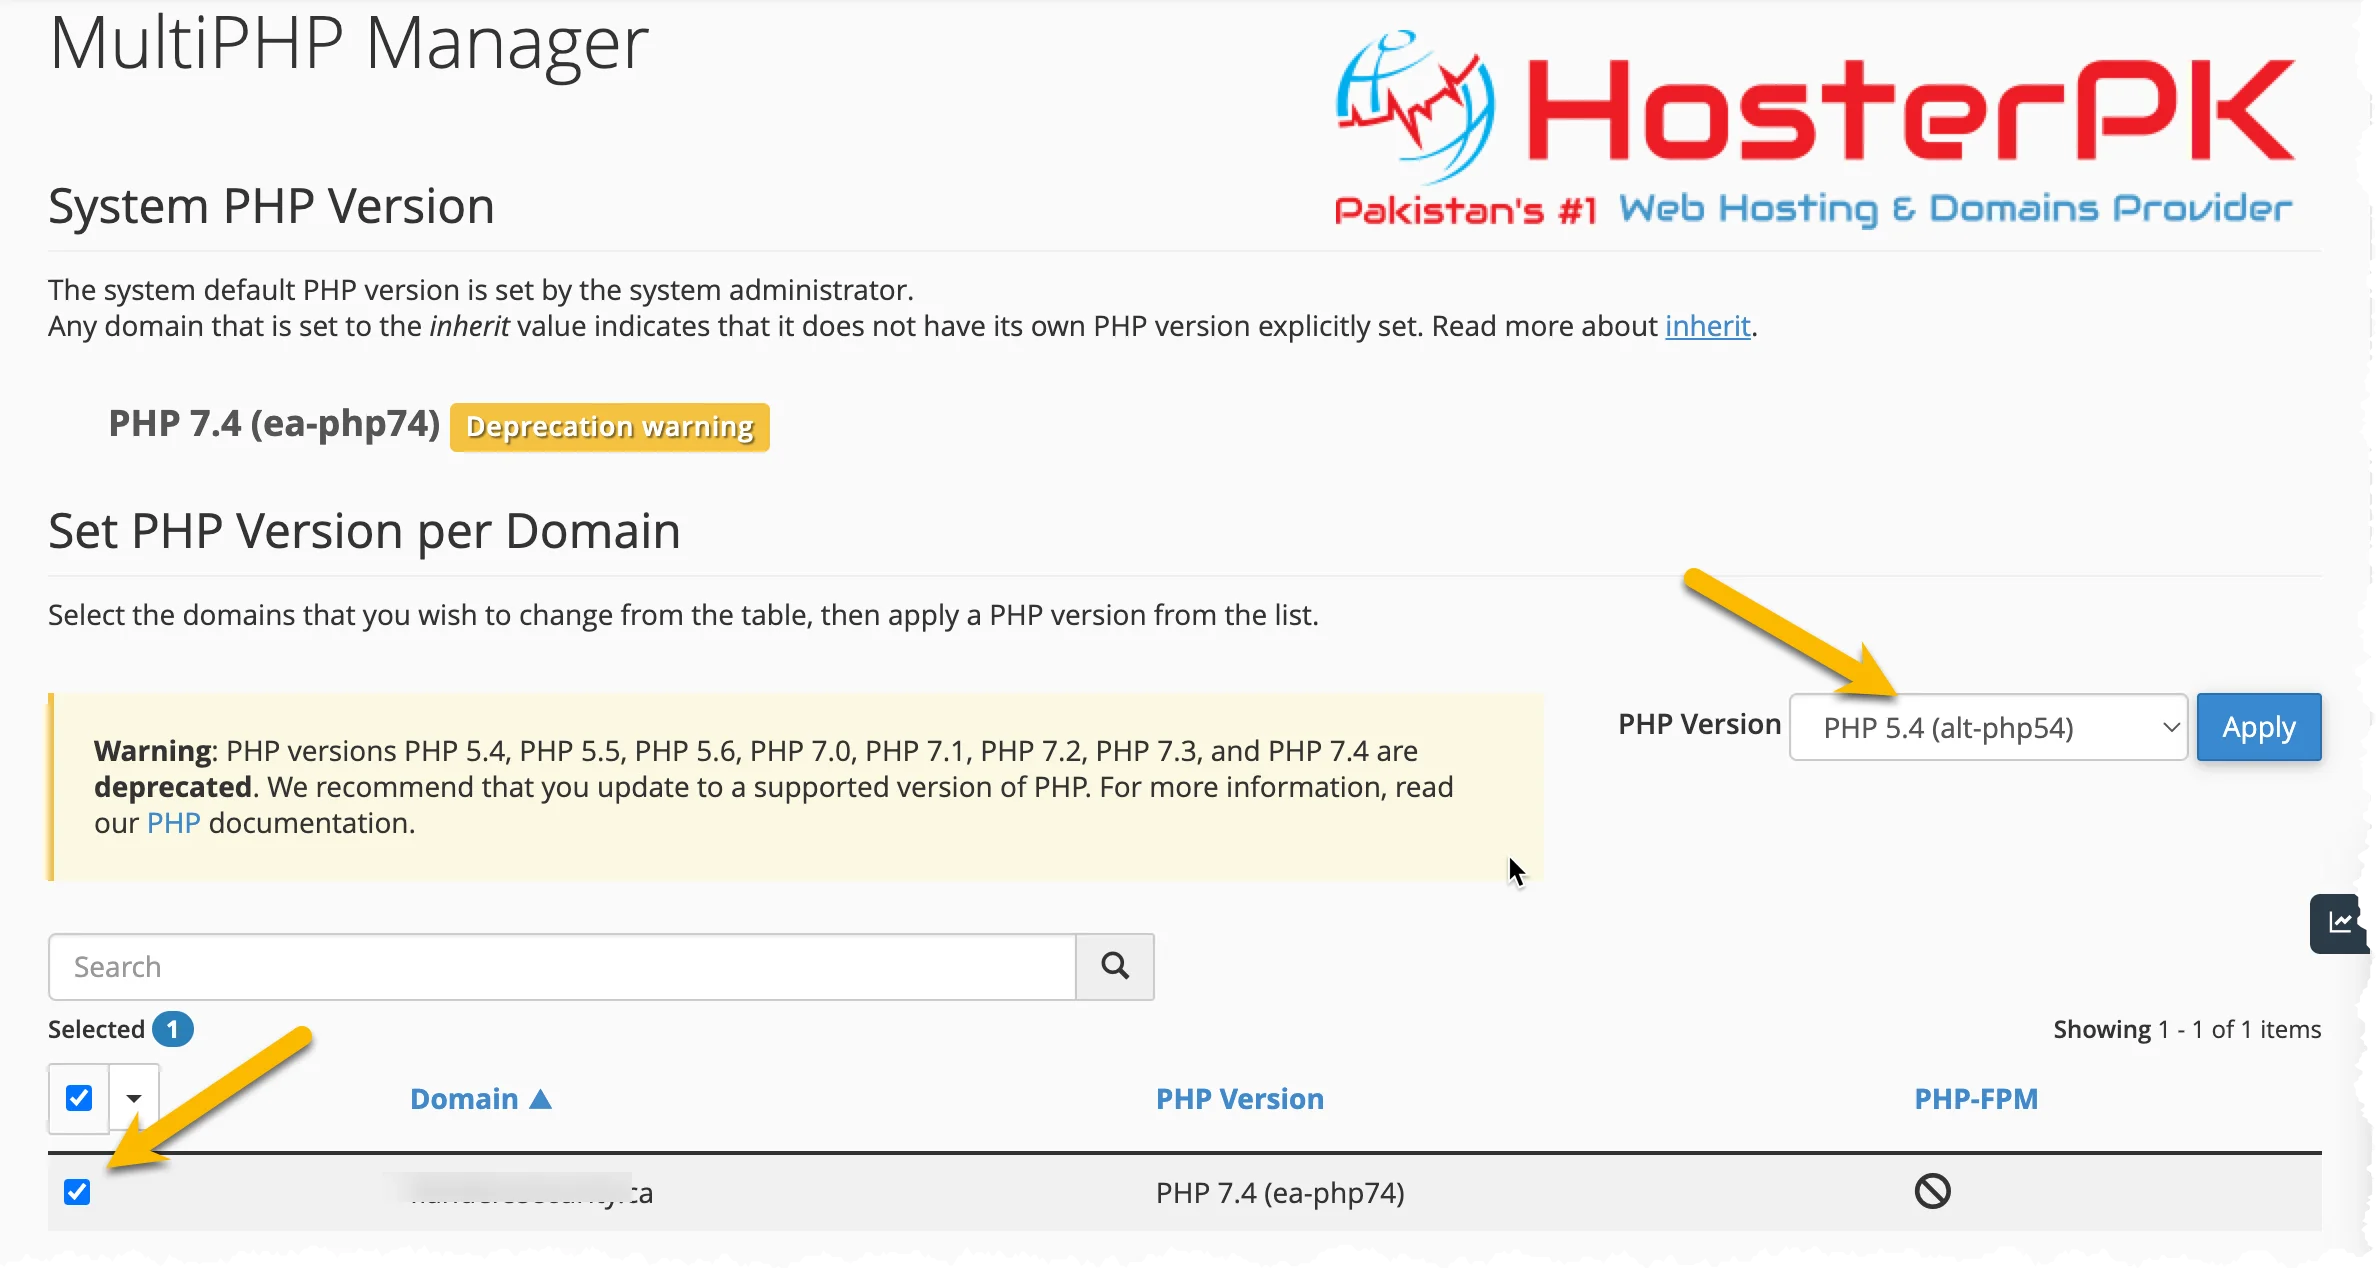
- On the next page, you’ll see a list of your domains and their current PHP versions.
- To change the PHP version for a specific domain, select the domain from the list and choose the desired PHP version from the drop-down menu.
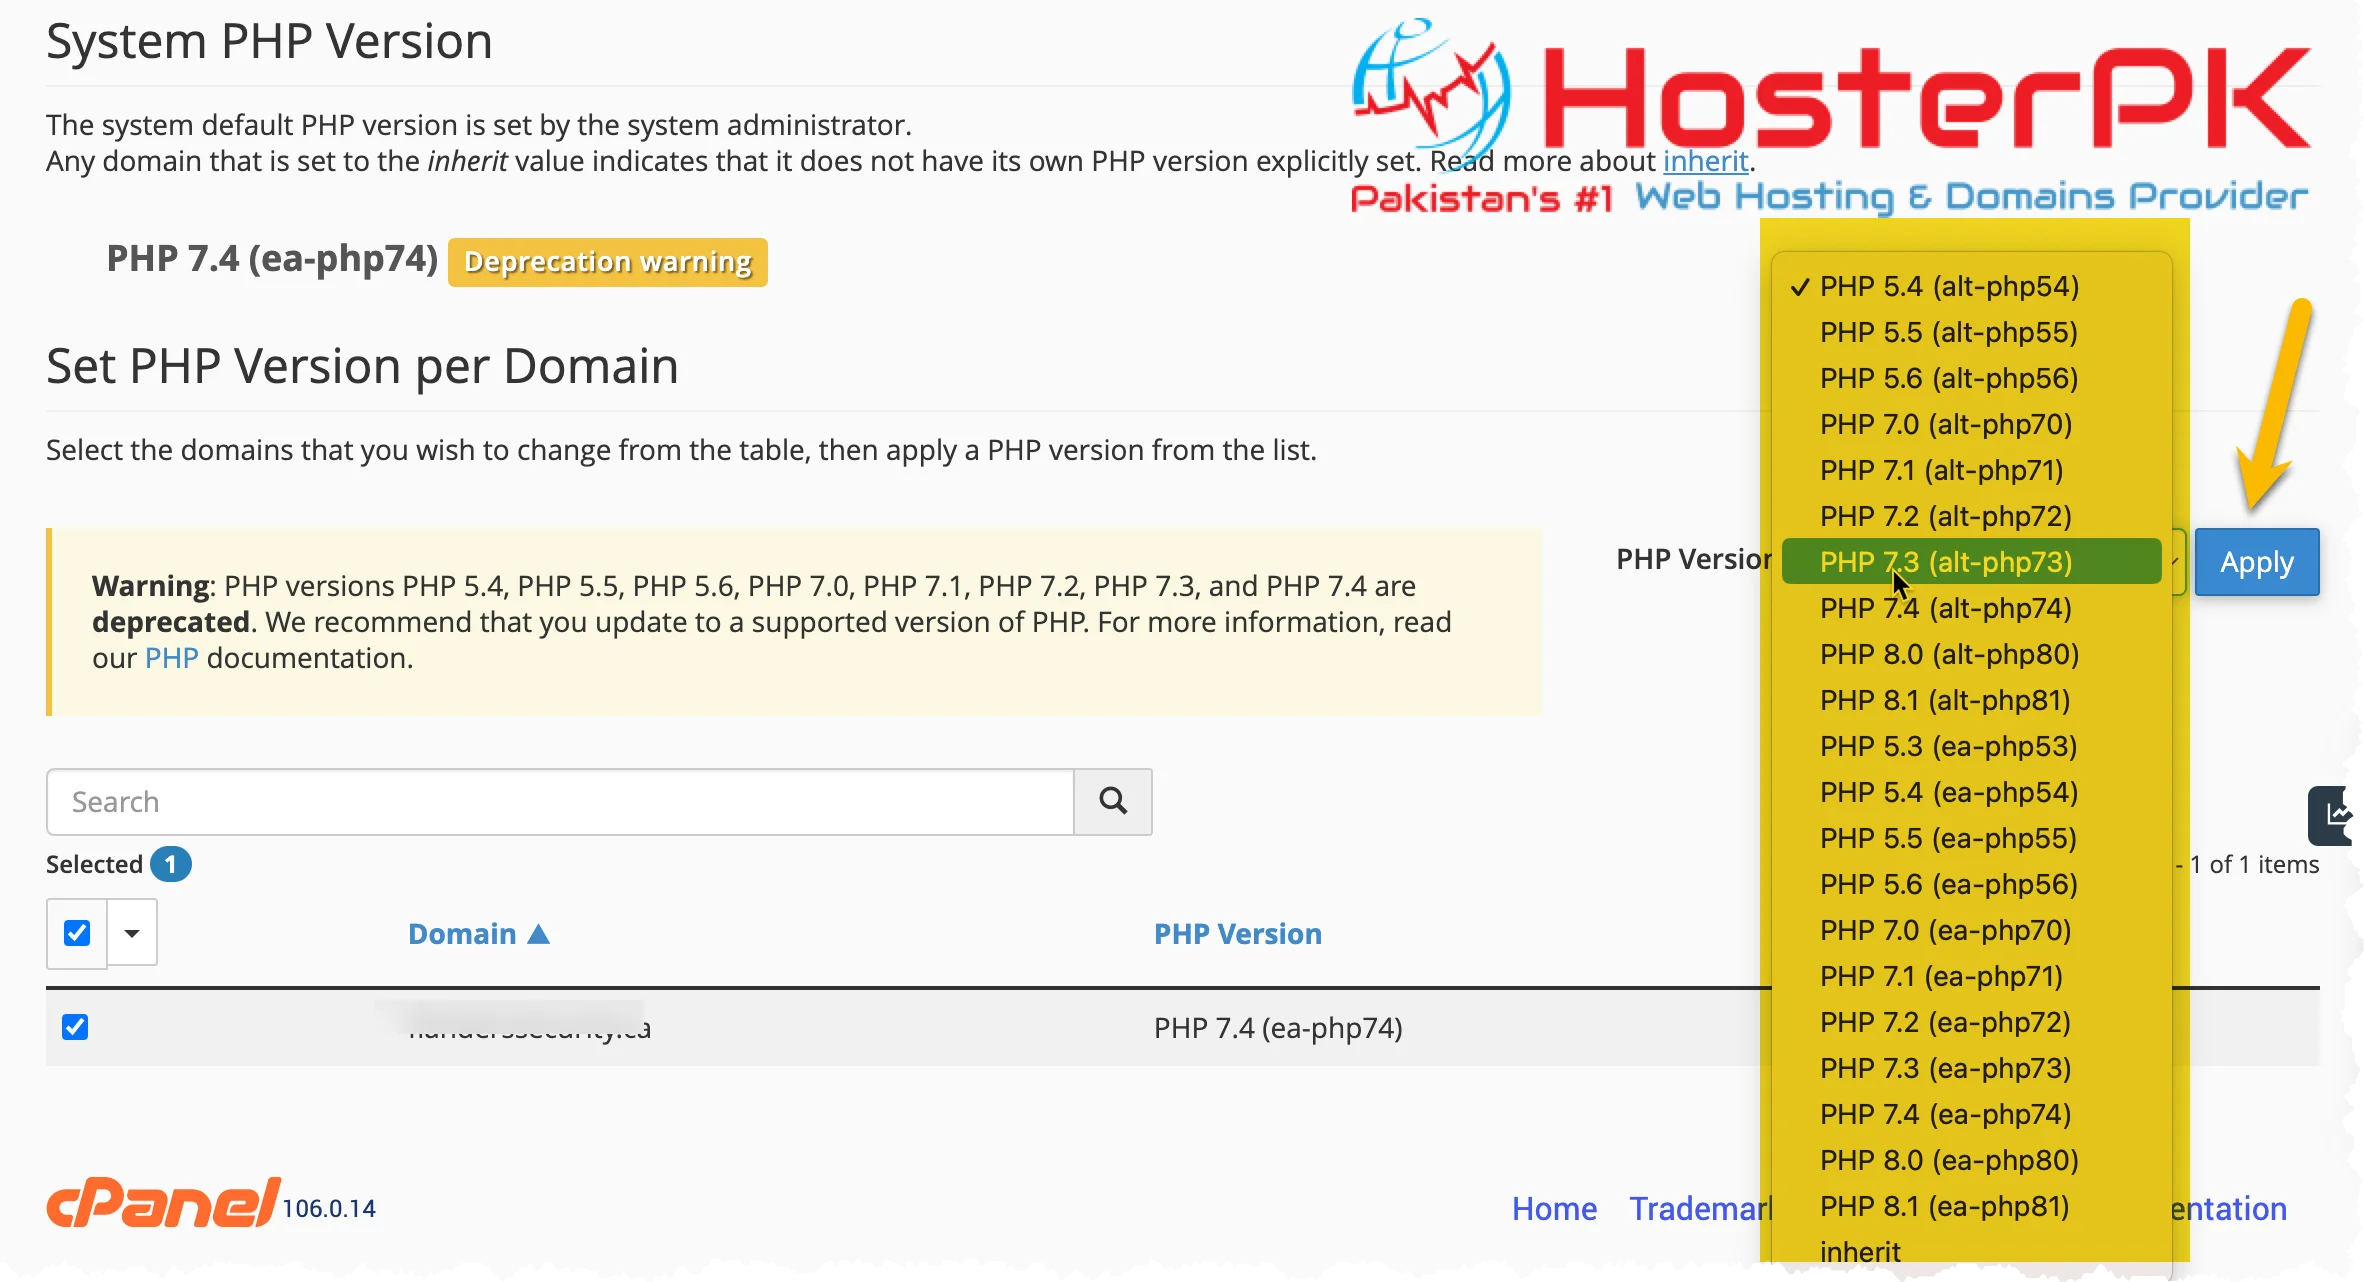
- Click on the “Apply” button to save your changes.
- PHP version changes will be confirmed by a message.
You should test your site thoroughly after making the change to ensure it works properly.
Using the .htaccess File
A .htaccess file can also configure your website’s PHP version. In the .htaccess file, a specific line of code is added (given below) to specify the PHP version. However, this method may only be available for some cPanel accounts and requires advanced knowledge of the .htaccess file and cPanel.
To change your site’s PHP version using .htaccess in cPanel, follow these steps:
- Log in to your cPanel account.
- Scroll down to the “Files” section and click on the “File Manager” option.
- In the File Manager, locate the .htaccess file in your site’s root directory. If it doesn’t exist, create a new file named .htaccess.
- Right-click on the .htaccess file and select “Code Edit” or “Edit”.
- Add the following line to the file:
AddHandler application/x-httpd-php[version number] .phpReplace [version number] with the desired PHP version number, for example, “72” for PHP 7.2.
- Save the changes to the .htaccess file.
- Test it thoroughly after making the change to ensure your site is functioning as expected.
Note: You may also need to modify your site’s .htaccess file or update your plugins and themes to ensure compatibility with the new PHP version. If you’re uncomfortable making these changes yourself, please open a support ticket or live chat session; our support team should help you.